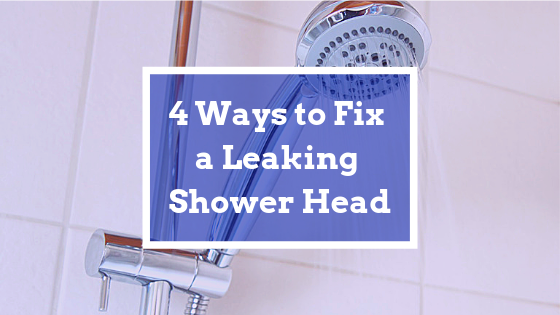
Are You Wasting Water with a Leaky Shower Head?
A leaking shower head can go undetected for a long time. The reason is because the shower is behind a curtain or glass partition and, really, if you aren’t taking a shower, you probably aren’t spending much time looking at a shower head.
The fact of the matter is, a dripping faucet or shower head is the second biggest waste of water behind a constantly running toilet. Water rationing is most likely with us for years into the future, so promptly fixing shower head leaks is good for the wallet as well as the environment.
To fix a leaking shower head, you may need to repair one or more of the components that make up the shower system by:
-
- Unclogging the shower head
- Replacing worn washers
- Replacing the diverter valve
- Replacing a problem cartridge valve
It may be the case that the problem isn’t with the shower ahead itself, but with some other plumbing fixture. So let’s look at how a shower works and what factors besides the shower head itself that might contribute to it leaking.
Why Is My Shower Head Leaking?
Water that flows up and through a shower head comes from faucets located in the wall somewhere below the shower head. If you have a tub and shower combination, water pressure is diverted from the tub faucet to the shower head via a diverter valve. This is a lever close to the faucet or a push-pull rod that is positioned close to the faucet.
Leaks in the shower head may be due to an issue in the shower head alone, or in combination with other features in the shower. The way to determine this depends on your answers to the following questions:
-
- Does your shower head leak constantly, even with the shower faucet turned off?
You probably have an issue with the shower faucet but depending upon how long this has been going on, you may also have an issue with the shower head.
-
- Does your shower head drip for a while after the faucet is shut off, but then stops completely?
This is usually an issue with the shower head only.
The easier of the two repairs is the shower head. In either event, you need to shut off the water to the bathroom you are working in. Even if you are pretty sure it is the shower head, just turning off the faucet won’t stop from getting drenched if the problem is the faucet itself. Because a leaky faucet means water streaming up into the shower line.
Water coming from the shower line with the head unscrewed and the faucet off is a good way to determine that the leak is in the faucet itself. It’s still a better idea to first turn the bathroom water off, then remove the shower head and turn the water back on with the faucets closed to see if there’s a leak. Unless you intend to unscrew the shower head with a raincoat on or you just like to get wet. As professional plumbers, we highly recommend against this.
If you have an older house, you may not have a separate bathroom tub and shower water shut off. In this case, you have to shut off the water to the entire house. While you don’t need to do this frequently, it is still a bit of a pain. Ben Franklin Plumbing in the Bay Area can install water cutoff valves to your bathroom and other water using areas to help you avoid just such a whole house shut down when you need to conduct repairs.
Once you have the water to the bathroom and the shower head off, here are the four ways to fix the potential sources of the leak.
Unclogging the Shower Head
Over time, shower heads are prone to accumulate lime and other mineral deposits that clog the holes. You can suspect this is the issue if the shower head drips after you turn off the water, but eventually stops. It’s likely the head is holding water and is unable to drain quickly. If this is the case, you are probably also experiencing a weaker flow from the shower head.
-
- Shut off the water supply and remove the shower head. The head should unscrew from the pipe that comes out of the wall. Turn it counterclockwise.
- Inspect the holes in the shower head. Do they appear clogged with white minerals? Is the pipe you unscrewed the head from leaking? If it isn’t it may be that all you need to do is give the head a good soak and reinstall.
- If your shower head allows for this fix, unscrew the front faceplate. If not, then you will have to soak the entire head.
- Soak the shower head in white vinegar for six to eight hours.
- At the same time, inspect the washer in the back of the shower head. Is it worn? Pull it out and replace it with one from the hardware store.
- After the soaking, free the holes with a pin or toothpick that fits, then brush the faceplate clean with a stiff brush. Any debris that falls into the head should flush out once you reinstall the head and turn on the hot water.
Replacing Worn Washers In The Shower Faucet
A leaking shower head can be cause by worn washers and as noted above. If your shower head is older, it’s a good idea to replace the washer in the back while you have the head soaking. Over time, even the best washer or O-rings will deteriorate.
To replace the rubber washer in your faucet, disassemble the faucet handle by unscrewing it. The screw may be hidden behind a decorative cap. Remove the handled and remove the stem using a deep socket wrench. It’s best to buy a faucet washer kit and replace the rubber washer and other washers and seals all at the same time.
Replacing the Diverter Valve
The diverter valve is just a fancy name for the lever or knob that switches the direction of the water from the faucet to the shower head. In some cases, the diverter value is on the faucet itself and looks like a rod that is pulled up when the water is flowing to engage the shower head.
For the lever or knob style:
-
- Remove the faucet handle, disassemble the valve assembly and remove the diverter valve.
- Inspect for wear. If worn, replace the entire assembly. Otherwise clean with white vinegar.
For a faucet-located diverter :
-
- You may need to unscrew a plate under the faucet to remove and inspect the diverter value. In some cases, you may have to unscrew the entire faucet to get at the valve. Once you have it dissembled, find the rubber washer and reassemble.
Replacing a Problem Cartridge Valve
This valve is located in the water faucets or the single arm handle that swings from cold to hot and also initiates the water flow. Because there are many styles of faucet handles, we will list the most basic steps.
-
- Remove the faucet handle to expose the cartridge stem.
- Remove and replace the cartridge with an identical one. These cartridges are not designed to be refurbished.
In most cases, cleaning the shower head and replacing the washer or O-ring should handle a leaking shower head. None of these fixes are costly but they are still a hassle to perform. Ben Franklin Plumbing in the Bay Area offers a yearly maintenance plan that not provides comprehensive inspections that can catch small issues before they become real problems but discounts the needed services. Our professional team knows where to look for trouble and can save you a lot of money while keeping your plumbing system trouble-free.
-
- the actual savings of tankless water heaters
- How long do tankless water heaters last
- What are the best applications for tankless water heaters
- What is your best resource to evaluate whether a tankless water heater is good for ers are Worth It to You
At Benjamin Franklin Plumbing Bay Area, we’re here to support you every step of the way, from exploring your options to installing a new water heating system when you need to upgrade your home. If you’re thinking of getting a water heater, tankless of otherwise, contact us and talk to one of our plumbing and water heating experts.
